Wednesday, July 27, 2016

the river house #8: a new floor and a thunderstorm...

The basement of the River House continues, and if it were an episode of Fixer Upper, this would be the segment leading up to the drama of a cliffhanger commercial break...

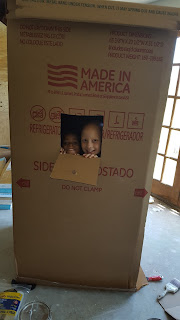
 But first, let's start with some cute children who built their own house out of the refrigerator box.


Let there be light!
 And the highlights of the week:

Air conditioning!  See that cute, little ductless unit on the wall?  Super energy efficient and will heat/cool the whole basement area beautifully.  And during the hottest part of the summer, it's awfully nice to be cool.

Wall paint!  We chose a pale gray called Gray Owl by Benjamin Moore.  It's beautiful, and it'll be even more so once we get trim and all the finishing details in there.

Lights!  Nothing beats lighting.
Sconces on the bathroom shiplap

Kitchen lighting


Front view of addition
 The addition is taking on more shape this week, too.
View from the back


If anyone is needing floor samples, spare yourself from going around town because I have ALL OF THEM.  When it came to flooring, I've been super perplexed.  What material, what color, how much do we want to spend, etc.  Solid hardwoods were out of the question since it is a basement, but I wanted the look of wood rather than tile or carpet.

Of course the big trend now is tile that looks like wood.  But it seems like it'd be so COLD.  And when my kids fall while playing, I don't really want them cracking their head on tile.

So we looked at using bamboo because of it's resistance to moisture and lower cost, then couldn't find one that we really liked or the cost we wanted.  Since we're also on a timeline, we wanted a floating or clickable floor instead of something we'd have to glue or nail down.  Nothing we wanted came in this option.

Then we turned to engineered wood because its surface level is the same as a real hardwood floor, but underneath are layers that are better for handling moisture.  This option costed significantly more, and I was going to take the plunge once I decided on a color I liked.

But then Marc found a sample that was almost identical in color and texture in a LAMINATE for way, way cheaper.  With a lifetime warranty.  I honestly didn't want to end up with a laminate floor, but the handscraped laminate flooring looks just about like the real stuff and you can't beat the price.

So I'm pretty stinkin' proud of myself because yesterday, I paid a babysitter and spent the day putting down the underlayment and laying the new floating floor in the main room.  Looks good, right?  With Marc at RUF staff training in Atlanta, I did this along with one of our contractor's workers, and boy, by that night my body was HURTING!  
Midway through flooring
And then, a major thunderstorm hit last night.  30mph winds and a TON of rain dumped out quickly.

(You see where this is going...)

This morning, I gasped when I saw water puddled all over my beautiful new floor.  THE DAY AFTER I PUT IT IN.

So, yeah.

Cue the tears.  Cue the stress.  Cue the extra time, the extra money, the extra material, the extra chocolate I will be consuming in my body tonight in attempts of killing the emotional pain I feel over this.

The water came in through the doorway, and went UNDERNEATH the moisture barrier layer.

So we had to rip up the section of new floor, suck up what water we could, and let it dry out.  Our contractor is quickly going to work putting up plywood to close in the addition, which will help it from ever happening again.

But for now, morale is down.


To be continued...

Saturday, July 16, 2016

the river house #7: momentum...

 Oh, there's so much I could blog about right now.  There's so much on my mind I could share.  About adoption. About race.  About alopecia. About the sweetness and the chaos of life with small children.

But for now, how about an update on the River House?

Because it feels like we've finally turned a corner on the basement this week.  And that's HUGE.

One of our new neighbors who has lived on the block for twenty years gave us a TREASURE when she gave us these two pictures she took of the River House in 2006 before the previous owners began renovations.


Wow, right?  It's so hard to believe this is the same house... 


...as what we started with this year.  You can tell the previous owners had started something really special.


This was a BIG week in our basement reno!  Finally, we turned the proverbial corner.  And now it's a race to see if we can finish in time for our new RUF intern, Audrey, to move in when she comes to town in August.

This week, we sealed the brick walls and concrete floor.

And that piece of paper hanging from the header?  A passed inspection on framing, plumbing and electrical!

Which gave us the green light to move along to insulation and drywall- yesssssss.
Take a last look through the closet into the bathroom because you'll never see it again...

Houston, we have insulation.
I never want to hang insulation again.  I start itching just thinking about it.


(And somehow I keep finding these kind of pictures on my phone... I wonder who the culprit could be...)

At times this River House project is so large that it takes up our entire block.  

This week the gas company worked hard (under a tent in the road, no less) to get the house connected to the gas line.


And checking in on the side addition, it's beginning to take shape! 

Back to the basement...

So, if you're going to pretend you're Joanna Gaines and redo a house with the show "Fixer Upper" as your inspiration, you know you've gotta put shiplap somewhere in the house! 

I decided I wanted it in the basement bathroom.  But the problem is... there's no shiplap sold anywhere in my town (can you believe it??  Travesty.).  So if I wanted it, we were going to have to make it. 

We bought a bunch of 1x8 boards from our local big box store, and our contractor's son routed each one out to make them more like the original tongue-and-groove shiplap.  
I sanded off the rough edges, and using a level, we hung the first board, starting at the top.


Continuing down the wall, we used nickels as our spacers between each board.  (thank you, Pinterest tutorials)

And by the end of the day, the "shiplap" was up!  (I decided to prime in the grooves before we hung each board.  That may have been overkill.  We'll see.)

It's going to look soooo good when it's painted!!

On the right, you'll notice we're creating some small built-in shelves between the studs that will be next to the vanity.


Batgirl meets drywall.
 I love how the kids are beginning to take on this house project as a family.   They help out here and there, but each day they love seeing and hearing about the progress and I think they're amazed to see something finally beginning to take shape.


My beautiful gal
 Caroline liked learning how to mud over the screws in the drywall.

Cute guy concentrating with tongue out
Jameson just likes to bang stuff and play with tools, pretending he's hard at work.

A couple of afternoons a week, I let the kids watch a movie on the laptop in the basement.  That buys me a little time to help out on the house.


So now we've hung the sheetrock, and we have walls!  Sheetrock is a game changer, for sure! 


Three coats of mud on the seams, and we'll be ready to begin trim and paint next week!


To be continued...