Friday, July 31, 2015

this old house: open house...

Whew, y'all.

We're getting close to the end of the basement apartment phase to our 1820 fixer upper project!

And since we're closing in on the time when most people are done moving into new places for the school year, it's time to find a tenant and start collecting rent!

(Dare I say the fleas are gone??)

After a quick post to facebook and craigslist, I was answering emails and notifications non-STOP!  Let me tell you, there is NO shortage of people in love with the rustic farmhouse style.  But instead of making a million appointments to show the apartment, we decided to do more of an "open house" showing the next evening.  When someone would inquire about seeing the house, I'd tell them about the open house and give them the house's actual address.

It's sad how many people were automatically weeded out when they got the address.  (Perhaps another post about that another day?)

open house day
 But I knew some people were still coming to look at it, so it was time to pull this place together for the open house QUICK!

If you've ever seen the home remodeling shows on HGTV, the final day before the open house was exactly like those last, crazy hours on TV where everyone's scrambling and the paint is barely dry.

We literally had the air conditioning guy there  drilling through brick and installing a nice, new ductless heating AND air unit until MINUTES before the open house.

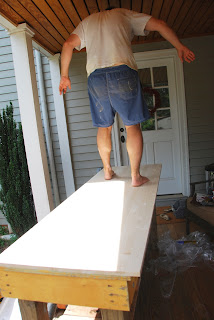
As I was running around putting last-minute paint touch ups on the place, Marc refinished the apartment's screen door on the deck of the main house upstairs.  (which currently is inhabitable.  This will be our next big project after we finish the exterior of the house.. next summer, perhaps??)
 The washer/dryer combo was delivered just a few hours before the open house.  Have you seen these??  We hadn't until I happened to be watching one of those "Tiny House" shows and saw it there.  This one 24" unit BOTH washes AND dries a load of clothes!!  All they need is a regular outlet and a sink pipe to tie into.  They're used all the time in kitchens in Europe.  

What a great solution for a small space that we were racking our brains about how to provide laundry in!  Sure, it wasn't cheap.  But we can provide laundry.  And we think it'll pay off for us in the long run.  

No time to hook it up, but at least we got it set in place for people to see.

And somehow it all came together at the very last minute.
Let the open house begin!


To be continued...

Wednesday, July 22, 2015

this old house #2...

Woohoo!  The appliances are here!  Things are looking up on this basement apartment.

We're getting there.  We will get there.   

Eventually.

And then we'll have all the exterior and main house to tackle over the course of next year!  (I can't even begin to think about that.  Just want to get this part finished.)

Here's where we are now...

The kitchen!  We painted the cabinets black, (they look better black than they did white!) spray painted the middle section of the door with chalkboard paint, and finished sealing the floor.  

We still have several small details left to do, but our goal was to just get some pictures out so we could start advertising this place and find a tenant! 

In a rare moment of brilliance, I asked the appliance guys to let us have the boxes instead of hauling them away.

They became the perfect houses for the kids to play in while we worked inside.

After the fun of that wore off, they PAINTED their houses! 
(...and I learned I will never leave my two year old alone with a brush and a bucket of white paint again...)

Remember our flea problem?  One of our next strategies has been to seal the larger open cracks in the floors with black caulk, just in case any of them were entering the house from underneath. 

Next we began applying multiple coats of polyurethane to finish out all the floors.  Oh man, this is so tedious and time-consuming. 


The floor is actually not going to be this shiny.  (Let me apologize for that if you loved the shiny floor...)  I took the picture above before the poly had dried.  They'll have a satin finish to them, not glossy.  Shiny floors just didn't seem to be consistent with rustic 1820 style.

We've also been stripping these days.  (Stripping paint, of course.) 
The former owner had started the job, and it was up to us to finish it out.  I love the cool weathered and distressed look of this bathroom door underneath the black paint.

Here's a picture of the bedroom before the floors were sealed. (I'm pretty sure that floor was a gym floor at one time...)  Those blue window privacy panes have got to go.  And they will.  Eventually.

We honestly couldn't do what we're doing without the hired help of some folks in our ministry!  Mary spent hours working on stripping the paint off of the last bathroom wall so it would match all the others.

See that grimy old pipe in the corner?  Ewww...
 I painted it black and now it just disappears.

We took out the toilet (it's being replaced) and polyurethaned the walls and floors.  Looking nice, don't you think?
Here's where we have a discrepancy:  the cement shower with the copper piping.  

Some people seem to hate it while others think it's cool and brilliant.  Now, it may not be my first choice when it comes to a shower, but what else screams out a rustic, "earthy" style like cement and copper, right?  What do you think about it? 

Stay posted!  We'll be posting the final before and after pictures soon!  (And meeting prospective tenants!)

Monday, July 20, 2015

oh boy...

Oh Jameson, it's obvious you have a big sister who likes to dress you up...


Sunday, July 12, 2015

this old house...

Where is Norm Abram when you need him?

This old house (circa 1820) is about to do us in!  We knew what we were getting into at such a low price tag, but still.  It's killing us, aaaaahhhh!

Wanna see the VORTEX that's sucking away all of our time, energy, and money these days?  We really could make a reality tv show...

So... this house is actually considered a duplex by the city because of the basement apartment.  (also what will make this a great rental property for the future!)  A family had been living in the basement for years while slowly beginning some work on the top house.  (They didn't get too far, but thankfully did some of the big stuff like drywall, electrical, plumbing, etc.  We will still have our work cut out for us up there next summer, but it's gonna be awesome when it's finished...one day...)

We expected to quickly get the basement ready for a tenant to move in this summer, but if you know anything about these kinds of things, "quick and easy" is never the name of the game...

And would you believe that after countless foggers, pest control specialists, boric acid treatments, vacuuming every day for weeks, and professional flea treatments, we are still fighting fleas?!!?  Granted, we're down to just two or three a day.  But they're not dead yet.

We will win this war.  Eventually.

The kids were in heaven playing in the dirt trenches.
 In addition to the fleas and termites, we realized we had another big problem on our hands: water was slowly seeping through the brick wall into the basement. (eek!)  We had to quickly work to create a way for water to drain away from the house when it rains.

Enter child laborers.

Just kidding.  (Well, kind of.)


We hired help from a former RUF student as well as a current one to help us dig down far enough to the bottom of the house to install a french drain.  (Even if you don't know what a french drain is, please ooh and ahh at this point, because this is kinda a BIG DEAL for a do-it-yourselfer.  A contractor would have charged us something like $3,000.)

Jake digging up a concrete step.
This project involved a TON of digging.  I mean, a TON.  

And in the process, we damaged the water line to the house, hooray!  (Those "call before you dig" people? Worthless.)  So.... add another project to your to-do list, honey!

This guy is a stud.  He's so happy the digging is done.
Did I mention there was alot of digging?  Like DAYS of it.  And finally, it was time to seal the bricks and install the french drain pipe. (Mind you, this house has no cement slab for a foundation- it's too old for that.  We discovered that in 1820, they built houses on top of several large rocks- crazy!)

So there's the drain pipe we tunneled underneath the sidewalk and all the way around away from the house.  Oh, and do you see the repaired water line?  Good job, my hubby!  Now that that's done, it's time to fill all that dirt back in and add "laying sod" to the growing to-do list!  

So that's a little look at the outside.  Care to look inside a bit?

The basement apartment was super cool when the previous owners were living there.  It seemed as though it was almost move-in ready.

But we've had quite a time doing necessary things like painting, sealing the exposed brick wall (which is soooo cool!), and getting the floors ready to be sealed.  (In the picture above, the floors are still dusty from all the flea poison we've layed out.  Lemme tell ya, it's sooo encouraging to walk in there and literally see a flea jumping and dancing around in it's own POISON.  Die, you fleas.  Die.)

This was their rustic-styled kitchen before.

This is where it currently stands right now.  We're still keeping things rustic, but we've lightened up the walls with a fresh coat of paint, stripped the kitchen door and are putting chalkboard paint in that center area, painted some cabinets (the white one is going to be painted black), and put in our cool countertop table I showed you a few posts ago.  
Stainless steel appliances are on the way, and once the floor is cleaned up and sealed along with all the other little details, I think it'll be a cool little farmhouse kitchen!  

That's where it is now.  We're so ready to get this thing flea-free and rented!

Can't wait to show you pictures of the finished place.

Friday, July 10, 2015

hands of love #26...

Ready for some recipes???

It's been a year since our last "hands of love" post!  Originally, the posts were during our time of "nutritional therapy" as Caroline's hair was falling out and we dived head-first into the world of gluten free eating to see if it would make any difference.  (Who knew that would be the way we'd discover that Marc would be the gluten free one among us?!)

When we ventured into the land of gluten free, I knew very little about food or cooking, and so it's probably not a surprise that the whole endeavor was FAARRR more burdensome than enjoyable initially.  But it was through that crazy time I began to read ingredient labels and understand what was IN our foods and why that mattered.  Cooking began to give me more joy as I understood more about it.  I'm definitely no "foodie," and I'm definitely not on any type of strict food restrictions, but I do love to (as much as I'm able) make and eat meals full of nutritious, whole foods that actually work for my body instead of against it.  (and most of those happen to be naturally gluten free!)

I found some great recipes to share!

THIS (pictured left) is the salad I want to eat for the rest of my life:  Southwestern Chopped Salad with Cilantro Dressing.   Oh my goodness, yummmmmm.  It'd be great for picnics, church functions, company, everyday, anyday, TODAY.

Both kids ate this salad.  (can I repeat that?)
BOTH KIDS ATE THIS SALAD.

(I'd probably double the ingredients in the dressing next time, because can you really get enough Creamy Cilantro-Lime Dressing in your life??)

I'm convinced the secret to cooking with small children or if you're super busy is one thing:
THE CROCKPOT.

I'm all about dumping in a bunch of stuff and having dinner waiting for me when I get home.  It's even better when I can double or triple the recipe to freeze extras for future meals, and here's one of those easy, GREAT meals: Enchilada Chicken Stew.  (just garnish with cilantro and avocado.  Honestly, honestly- I didn't miss the cheese this time.  But of course, you could add it!)

Here's another super delicious one: Quinoa & Vegetable Stir Fry.  Quinoa (pronounced "KEEN-wah") is a grain, similar to rice but with more protein and nutritional content.  I actually didn't have any quinoa on hand, so I opted for brown rice instead, and doubled the amount of rice the recipe called for.

I also added some shrimp cooked in soy sauce to the meal.  (for the record, Kikkoman and La Choy soy sauces are gluten free)


This was a yummy alternative to coleslaw, No-Mayo Avocado Slaw.  Took me 10 minutes to make.  Next time, I'd put less vinegar than the recipe calls for, but it was still a GREAT side dish with our hamburger/hot dog cookout with neighbors.  (And not to mention, stocked full of good veggies.)

There you have it!  From my hands of love to yours.  

Sunday, July 5, 2015

redefining family...

this pic was the "features" page of the article
It's kinda fun to be little local celebrities for the day.  

This month's issue of our local magazine, Lynchburg Living, ran an article about adoption called "Redefining Family" and we were given the opportunity alongside two other families to be featured in the magazine!

Here's the link to see the article with the pictures.  (We're on page 11, and pages 48-55.)


I was NOT so pleased with what goofballs Marc and I look like in this picture!
Oh well, at least Jameson looks great!  You can't win 'em all...
 Even though the writer apologized to me for not having more space to write more of our story, Marc and I were pleased with how much she WAS able to capture in such a small space.


The writer herself has fostered and adopted many children, and it was an honor to connect with her! 


This awesome pic was the cover page to the article- LOVE!
Now, I don't know if anybody actually READS the magazine, but it's all over town, so it at least feels like our little 5 minutes of fame, ha!  

 I hope that some who do read the article or see our family's pictures might be inspired themselves to consider adoption for their family.

If my kids' smiles could somehow convince someone to take that move forward towards adoption, I'd be overjoyed.  


(As the article mentions, 1 in 3 families discusses adopting, but only 2% of families actually adopt.)


Caroline's diagnosis of alopecia is explained in the article as well, and I feel like it'd be a HUGE victory even if a hand-full of people walked away from that article with a new awareness of alopecia.

Oh, if only more people knew about alopecia, what an easier life we would lead...

I hope that somehow, in some small way, seeing the love within our family might help build bridges between races on both sides.  Families don't have to match to be family.  I love that the writer included me saying we're not a white family with a black son, but that we're collectively a black and white family now.


My greatest hope as people look at our family and read our story is that they'll see a God who is always at work in our lives, through our suffering and not just in spite of it.  He's governing His creatures and writing all of our stories.

I hope they'll see a Father who adopts ALL of his children, who Himself has a multi-racial family with children from every land and every tribe.

It's my hope that the story He has written in my little family, even as unplanned as it orginally seemed, will somehow lead others to trust in His tender goodness, grace, and timing.

To Him be all the glory.


Saturday, July 4, 2015

before and after: kitchen countertop...

I'm soooo excited to share this post!  It's been months in the making, and it's finally done!

A few months ago, Marc and I bought a historic 1820 fixer upper house.  It's got tons of potential and has an amazing rustic, farmhouse style that's inspired a whole new way of looking at interior design for me (I promise to show some pictures soon so you'll see what I mean!).  

There's a main house and a basement apartment that we'll eventually have as two rentals.  We're currently working to finish out the basement apartment in hopes of having it rented by August 1st.  (Let us know if you have anyone interested!  This place is so one-of-a-kind!)

basement kitchen counter
An awesome hipster family was living in the basement apartment when we bought the house.  (They were slowly working on the main house upstairs, but it's still very much in the rough and uninhabitable.)  In the basement's kitchen, they were using this beautiful old farmhouse table with storage beneath for their countertop and cabinetry.

When the family opted to take the table with them in the move, (I don't blame them!) I began spending hours and hours scouring craigslist and antique stores looking for a similar solution that just wasn't the typical countertop and base cabinet.  But to find something in the right dimensions that preserved the style I was hoping to maintain was going to cost me thousands of dollars.  (And when you're talking rental property, that's not where you want to throw thousands of dollars.)

Discouraged and without any decent options, I gave up looking and continued working on other aspects of the house.

Our workbench is about to get a makeover!
It was during a trip out to the SHED of our house to gather some tools that I noticed this old table that served as our workbench.

It was the right dimensions (except it would need to be raised up to countertop height) and the right style, and with a little do-it-yourself project, this would become the TABLE!!!  

Crazy how it had been sitting right in front of me all along.

First step: take off the legs.
 These 4x4 fence posts happened to be laying in the yard, so with a chop of the saw they became the perfect, chunky table legs. 
 Now at countertop height!

Next step: add a shelf underneath for some open storage.
Who says wood needs to match?


Using some 2x4's and several pieces of old scrap wood laying around the house, we created this beautiful lower shelf, creating the look of rustic, reclaimed wood. 
Now for the countertop.

Ideally, I would have loved a true butcher block, but again, I wasn't willing to dish out hundreds of dollars.

I was going to try my hand at building a wood countertop myself by gluing and clamping planks of wood together, but when I found a stainable, solid spruce panel at a home improvement store for only $35, that made the decision a whole lot easier.

We sanded the top of the workbench, and put an entire tube of liquid nails on it.
 Then it needed ALL THIS WEIGHT to help it glue down.
(ha ha!)


our little contractor, with a pencil behind his ear


 Okay, so with only one clamp in our possession, we just piled everything we could find on top to help secure it down overnight.

Unfortunately, after a very humid night, the wood panel bowed up and needed further securing with screws from underneath to keep it laying flat.

finished product!
Once the panel was secured, I used painter's tape to tape off the edges and began the steps of light sanding, staining, and sealing.  I applied three coats of stain and two coats of this waterproof butcher block finish that's safe for food prep along with a couple of shiny new drawer handles.  We opted not to paint the mustard-color body of the table as I think it blends pretty well and maintains the old, rustic look we're after.
And here it is sitting in the kitchen basement! (which we have since painted)  For well under $100, we were able to design and create a truly unique kitchen island!


What do you think?  Pretty cool transformation, eh?