 |
| Before |
Oh man, it was rough. Just a cement slab and a wide open area filled with cobwebs.
But after the blood, sweat, and many many tears.... cue drum roll.....
 |
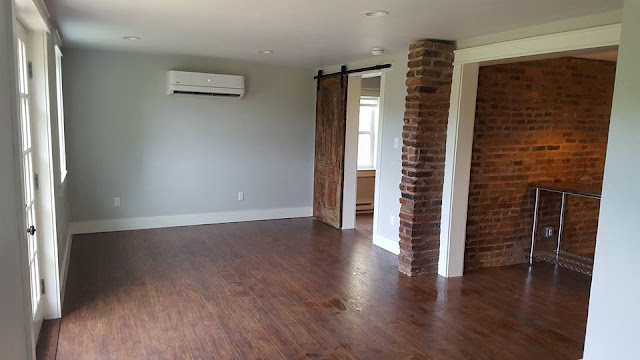
| AFTER! |
(Those of you who watch the tv show "Fixer Upper" can see the Chip and Joanna inspiration in this space!)
 |
| Sliding historic door |
We really wanted to preserve some of the home's history, so we left exposed brick walls and used an old door we found inside the house as a sliding door into the bedroom.
I LOVE how the lathe wall turned out! These were the strips of wood that were under the original 1901 plaster walls upstairs. When we demo'd the walls, I saved some of the wood for this project.
 |
| Lathe wall |
To make the lathe wall, we hung sheets of regular plywood over the studs in lieu of sheetrock, then beginning at the top, I hammered in each strip of lathe wood, making sure they were level and varied in color.

The french doors were already there, but we added a window on each side. Look at that view of the James River!
 |
| bedroom |
 |
| bathroom |
We also turned an old cart/island into our sink vanity and I love how it turned out!
The kitchen proved to be the trickiest room to design, mostly because when our family moves in, I wouldn't need a full 2nd kitchen in the basement, so I didn't want to use up a bunch of space. Nevertheless, in the meantime, we needed a kitchenette that could still function for our tenant (or for guests or tenants in the future).
So it made sense to try to fit everything we absolutely needed along the back brick wall, and then use a stainless prep table as a countertop. And it worked!

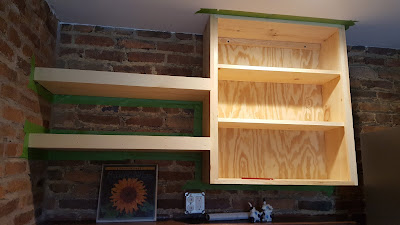
I designed the cabinetry and used green painter's tape to check the layout on the wall. I decided on a combination of open shelves and a closed standard cabinet.
Our contractor built the cabinetry. It's SO cool to see things you've thought of actually come into existence!
This is where the kitchen stood the day of our final city inspection. Our intern, Audrey, was waiting by the phone in Greensboro, NC, for us to pass this inspection so she could move to Lynchburg! We had high hopes that we'd pass, and she'd move in the same day.
But unfortunately, we failed inspection.
And not because of anything inside! We failed because we didn't have legitimate steps leading up to the back of the house. Grrrrr. It was a super disappointing and stressful moment.
But our amazing contractor, Mr. Larry, got right to work that same day building a small deck off the back of the house.
Audrey moved in that afternoon and she LOVES her new space.
I was able to finish staining the cabinetry, and now we're DONE with the basement!
On to the next phase of renovation... the upstairs!
But first, a much needed break for the semester.


No comments:
Post a Comment